公式に書いてあるとおりの手順で、まずは動く環境を作ります。
Docker
Docker CommunityEdition インストール
$ sudo yum install -y yum-utils device-mapper-persistent-data lvm2
$ sudo yum-config-manager --add-repo https://download.docker.com/linux/centos/docker-ce.repo

$ sudo dnf install docker-ce
Docker バージョン確認
$ docker -v
Docker version 23.0.1, build a5ee5b1
ユーザグループ Docker に追加する?
毎回 sudo するのも面倒なので、運用するユーザグループに追加しようと思いましたが、やってみた所ダメでした。
$ sudo usermod -aG docker user

$ sudo systemctl start docker
$ docker run hello-world
docker: permission denied while trying to connect to the Docker daemon socket at unix:///var/run/docker.sock: Post "http://%2Fvar%2Frun%2Fdocker.sock/v1.24/containers/create": dial unix /var/run/docker.sock: connect: permission denied.
See 'docker run --help'.
sock ファイルを chgrp するとか chmod で権限を大きくする、みたいな話が出てきたのですが、前者はともかく後者は……という感じだったので、Socket ファイルを確認してみます。
$ ls -lha /var/run/docker.sock
srw-rw---- 1 root docker 0  2月 20 22:32 /var/run/docker.sock
うーん?
まあここで詰まるのは本意じゃないので、毎回 sudo すればいいか。
hello-world して動作確認する
うごきましたね。
$ sudo docker run hello-world
Unable to find image 'hello-world:latest' locally
latest: Pulling from library/hello-world
2db29710123e: Pull complete
Digest: sha256:6e8b6f026e0b9c419ea0fd02d3905dd0952ad1feea67543f525c73a0a790fefb
Status: Downloaded newer image for hello-world:latest

Hello from Docker!
This message shows that your installation appears to be working correctly.

To generate this message, Docker took the following steps:
 1. The Docker client contacted the Docker daemon.
 2. The Docker daemon pulled the "hello-world" image from the Docker Hub.
    (amd64)
 3. The Docker daemon created a new container from that image which runs the
    executable that produces the output you are currently reading.
 4. The Docker daemon streamed that output to the Docker client, which sent it
    to your terminal.

To try something more ambitious, you can run an Ubuntu container with:
 $ docker run -it ubuntu bash

Share images, automate workflows, and more with a free Docker ID:
 https://hub.docker.com/

For more examples and ideas, visit:
 https://docs.docker.com/get-started/
hello-world イメージを削除する
動作確認したかっただけなので、 hello-world イメージは削除しましょ。
$ sudo docker ps -a
CONTAINER ID   IMAGE         COMMAND    CREATED         STATUS                     PORTS     NAMES
97908c7b341c   hello-world   "/hello"   3 minutes ago   Exited (0) 3 minutes ago             peaceful_nash

$ sudo docker stop 97908c7b341c
97908c7b341c

$ sudo docker images
REPOSITORY    TAG       IMAGE ID       CREATED         SIZE
hello-world   latest    feb5d9fea6a5   17 months ago   13.3kB

$ sudo docker rmi feb5d9fea6a5
Error response from daemon: conflict: unable to delete feb5d9fea6a5 (must be forced) - image is being used by stopped container 97908c7b341c
#=> 複数のタグがついているので削除できないので、削除を強制する必要がある
$ sudo docker rmi -f feb5d9fea6a5
Untagged: hello-world:latest
Untagged: hello-world@sha256:6e8b6f026e0b9c419ea0fd02d3905dd0952ad1feea67543f525c73a0a790fefb
Deleted: sha256:feb5d9fea6a5e9606aa995e879d862b825965ba48de054caab5ef356dc6b3412
これでよし
Docker-compose
インストール
dnf install docker-ce した時に一緒に入っていた模様。
$ sudo dnf install docker-compose-plugin
メタデータの期限切れの最終確認: 0:56:41 時間前の 2023年02月20日 22時04分34秒 に実施しました。
パッケージ docker-compose-plugin-2.16.0-1.el8.x86_64 は既にインストールされています。
依存関係が解決しました。
行うべきことはありません。
完了しました!
バージョン確認
大丈夫そうですね。
$ docker compose version
Docker Compose version v2.16.0
NginxProxyManager インストール
ポート開放
firewalld の確認
firewalld 動作しております (アプライアンスがネットワークの先頭にいるので切ってもいいヤツ) 。
$ systemctl status firewalld
● firewalld.service - firewalld - dynamic firewall daemon
   Loaded: loaded (/usr/lib/systemd/system/firewalld.service; enabled; vendor preset: enabled)
   Active: active (running) since Tue 2023-02-21 06:48:16 JST; 7h left
     Docs: man:firewalld(1)
 Main PID: 839 (firewalld)
    Tasks: 3 (limit: 23263)
   Memory: 36.7M
   CGroup: /system.slice/firewalld.service
           └─839 /usr/libexec/platform-python -s /usr/sbin/firewalld --nofork --nopid
現状のルール確認
適用する zone を指定しないといけなくて、以外と面倒なんですよね。 今回は public に開放するサービス (port) を追加すれば良いようです。
$ sudo firewall-cmd --list-all
public (active)
  target: default
  icmp-block-inversion: no
  interfaces: ens3 ens4
  sources:
  services: cockpit dhcpv6-client ssh
  ports:
  protocols:
  forward: no
  masquerade: no
  forward-ports:
  source-ports:
  icmp-blocks:
  rich rules:
ポート開放と設定有効化
--add-port したのち、 --reload でプロセスに設定再読み込みを行わせます。
$ sudo firewall-cmd --add-port=80/tcp --zone=public --permanent
success
$ sudo firewall-cmd --add-port=81/tcp --zone=public --permanent
success
$ sudo firewall-cmd --add-port=443/tcp --zone=public --permanent
success

$ sudo firewall-cmd --reload
success
ポート開放結果を確認する
ports: 80/tcp 81/tcp 443/tcp と追加されているのがわかりますね。 サービス名 http, https で指定しても良さそうですが、 NginxProxyManager の管理ポートである :81 は直接指定するしかなさそう。
$ sudo firewall-cmd --list-all
public (active)
  target: default
  icmp-block-inversion: no
  interfaces: ens3 ens4
  sources:
  services: cockpit dhcpv6-client ssh
  ports: 80/tcp 81/tcp 443/tcp
  protocols:
  forward: no
  masquerade: no
  forward-ports:
  source-ports:
  icmp-blocks:
  rich rules:
Docker-compose 用 yml ファイルの準備
Docker-compose で利用する yml ファイルを準備します。
$ mkdir ~/nginx-proxy-manager; cd $_
$ vi ./docker-compose.yml
~/nginx-proxy-manager/docker-compose.yml
version: '3'
services:
  app:
    image: 'jc21/nginx-proxy-manager:latest'
    restart: unless-stopped
    ports:
      - '80:80'
      - '81:81'
      - '443:443'
    volumes:
      - ./data:/data
      - ./letsencrypt:/etc/letsencrypt
起動する
docker compose の plugin を使っているので以下のコマンドで起動します。
$ sudo docker compose up -d
[+] Running 33/33
 ⠿ app Pulled                                                                                                                                      22.8s
   ⠿ 4500a762c546 Pull complete                                                                                                                     2.2s
   ⠿ 2064244d4a45 Pull complete                                                                                                                     2.3s
   ⠿ 84215fabca57 Pull complete                                                                                                                     4.0s
   ⠿ b76f93d918a0 Pull complete                                                                                                                     4.1s
   ⠿ df317c467603 Pull complete                                                                                                                     4.2s
   ⠿ 83b1b9be61d5 Pull complete                                                                                                                     4.4s
   ⠿ 60d6f63fc4c0 Pull complete                                                                                                                     4.6s
   ⠿ a4d97773651a Pull complete                                                                                                                     7.9s
   ⠿ c06eb9e1dc9a Pull complete                                                                                                                     8.0s
   ⠿ a8167af86067 Pull complete                                                                                                                     8.1s
   ⠿ cd05bb490889 Pull complete                                                                                                                     8.6s
   ⠿ 723aeecfd151 Pull complete                                                                                                                     8.7s
   ⠿ 916e1ca435ed Pull complete                                                                                                                     9.2s
   ⠿ dae2831773a8 Pull complete                                                                                                                     9.3s
   ⠿ e87a4fe7a100 Pull complete                                                                                                                    10.1s
   ⠿ 458ba1ceb1d0 Pull complete                                                                                                                    10.5s
   ⠿ 368cd5f2b4c1 Pull complete                                                                                                                    10.6s
   ⠿ eac612b2d600 Pull complete                                                                                                                    14.3s
   ⠿ 5886c916a6d2 Pull complete                                                                                                                    14.3s
   ⠿ 20ee015b172f Pull complete                                                                                                                    14.4s
   ⠿ a50f24615148 Pull complete                                                                                                                    14.5s
   ⠿ 2ba8bdc1cb2e Pull complete                                                                                                                    14.6s
   ⠿ 8738d43676e1 Pull complete                                                                                                                    14.7s
   ⠿ aa813c6ef05a Pull complete                                                                                                                    14.8s
   ⠿ 003e6980c1b6 Pull complete                                                                                                                    14.9s
   ⠿ fb68e75b2b7a Pull complete                                                                                                                    15.1s
   ⠿ b98d05b8f325 Pull complete                                                                                                                    15.2s
   ⠿ 4f4fb700ef54 Pull complete                                                                                                                    15.3s
   ⠿ 748b5c7c86e2 Pull complete                                                                                                                    18.7s
   ⠿ 04aec91b6cb4 Pull complete                                                                                                                    18.8s
   ⠿ d854886c6c95 Pull complete                                                                                                                    18.9s
   ⠿ a046a4de3325 Pull complete                                                                                                                    19.1s
[+] Running 2/2
 ⠿ Network nginx-proxy-manager_default  Created                                                                                                     0.3s
 ⠿ Container nginx-proxy-manager-app-1  Started                                                                                                     1.7s
確認する
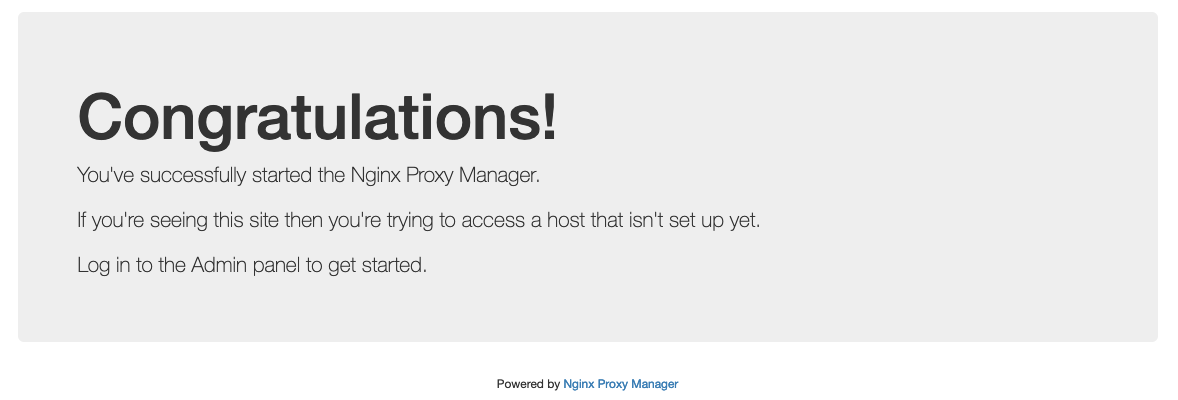
公式だと AdminUI にいけ、と書いているんですが、作った環境は 80 以外潰している (ならなんで開放した) という感じなので、publicUI な port 80 にアクセスしてみます。

大丈夫そうですね、お疲れ様でした。
ログインする
IPアドレス:81 でアクセスすると管理画面が見えます。 こちらに初期設定されている情報でログインしましょう。
| Email Address | Password |
|---|---|
admin@example.com |
changeme |
初回ログインすると、管理者のメールアドレス・パスワードを変更するように求められます。 素直に変更しておきましょう。
以下はパスワード変更する際の様子です、この前にメールアドレスの変更もあるんだけどスクリーンショット取得するの忘れた。

このあとは
AdminUI からログインして設定をしていけば良いでしょう。 時間ができたら次回!
追記:ホストを登録する時の条件
インスタンス作成と同時に作業していたら、いつまで待っても host を追加できなくて悩んでいたのだけど、どうも追加する対象にヘルスチェック送ってオッケーな状態じゃないと登録できないっぽい。